Create a Dedicated QWC User
Create a dedicated QuickBooks user for the Web Connector and assign the permissions needed for your nXus integration.
A dedicated QuickBooks user helps keep your Web Connector login separate from day-to-day staff activity. This reduces sync interruptions and makes it easier to manage permissions for your integration.
Why use a dedicated sync user?
- It prevents the Web Connector from sharing a QuickBooks login with a real person.
- It reduces login conflicts that can interrupt syncs.
- It gives you a clear place to manage permissions for API-driven actions.
- It makes it easier to troubleshoot authorization issues later.
⚠️ Permissions matter
The permissions assigned to this QuickBooks user determine what the nXus integration is allowed to do. Some API operations may require elevated QuickBooks permissions. For example, credit card refund creation may require administrator-level access depending on your QuickBooks configuration.
Before you begin
- Sign in to QuickBooks Desktop as an administrator.
- Make sure you are working in the correct company file.
- If QuickBooks is running in multi-user mode, switch to single-user mode before changing users and roles.
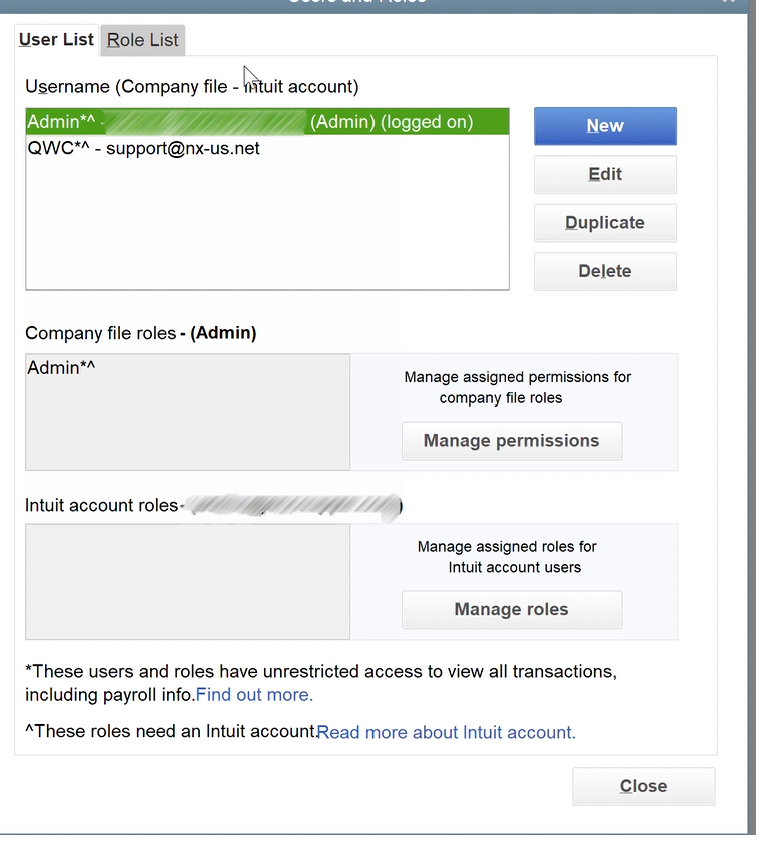
Step 1: Open the user management area
QuickBooks Enterprise
- Open the Company menu.
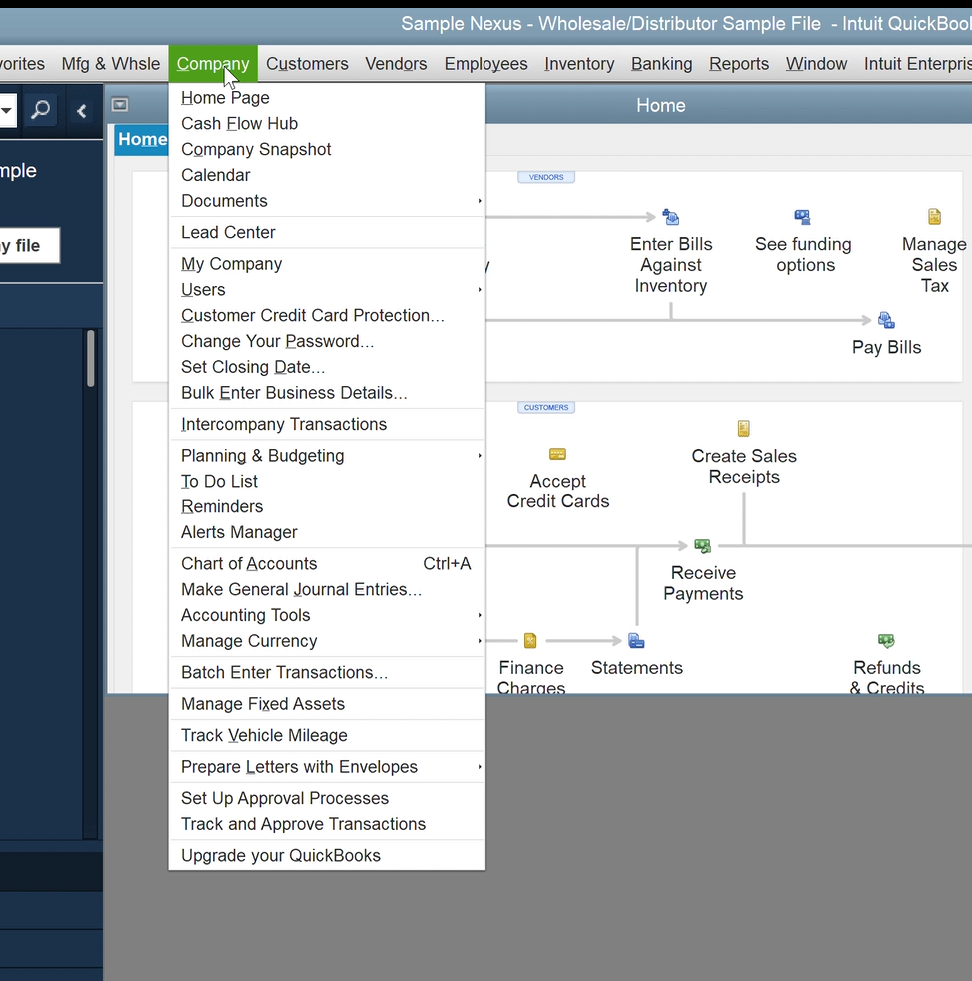
- Select Users.

- Select Set Up Users and Roles.
- Click New.
ℹ️ Note for older QuickBooks versions
Some versions of QuickBooks Pro and Premier use slightly different menu names for user management. If you do not see Users and Roles, look for Company → Set Up Users and Passwords → Set Up Users → Add User.
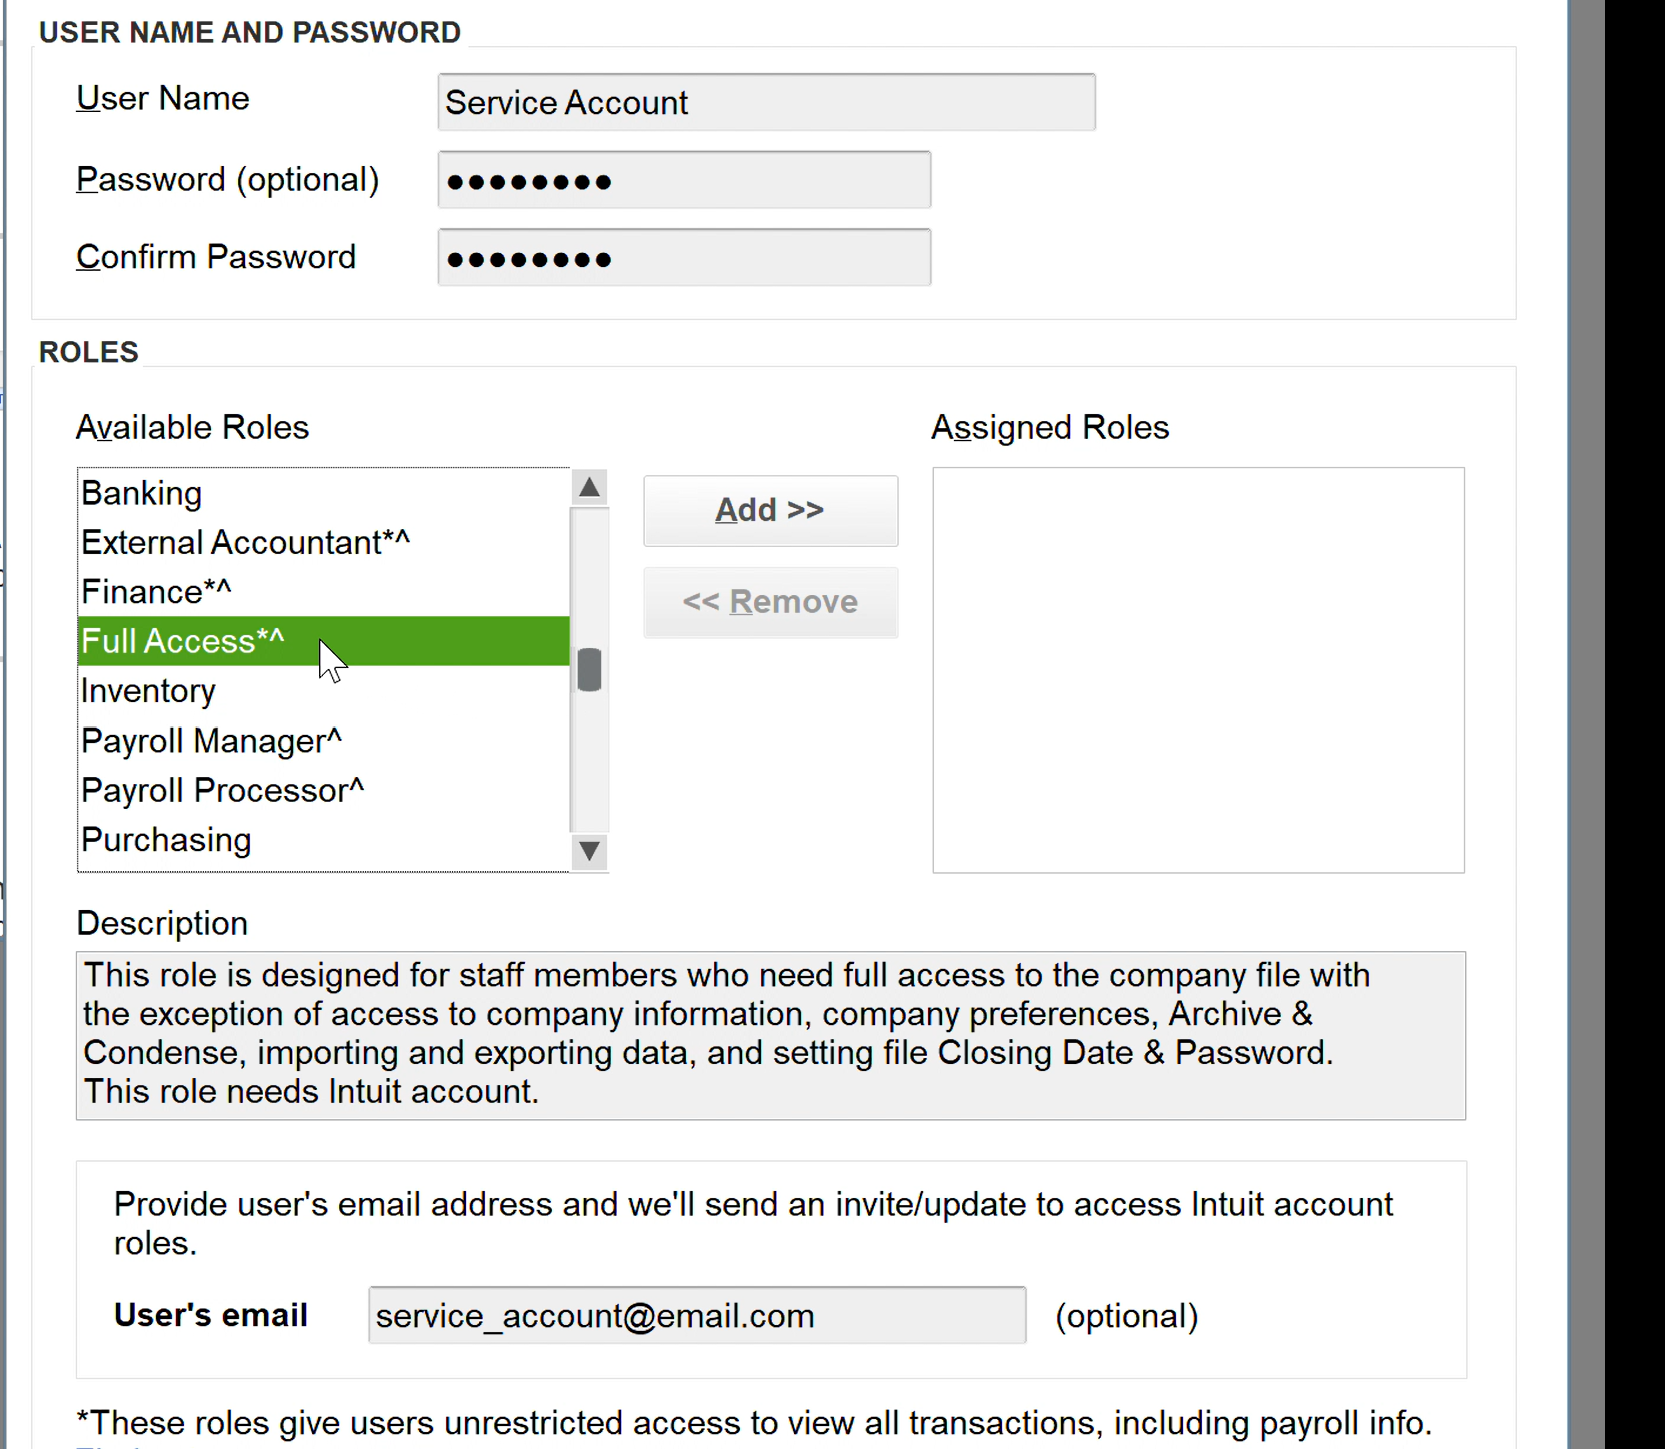
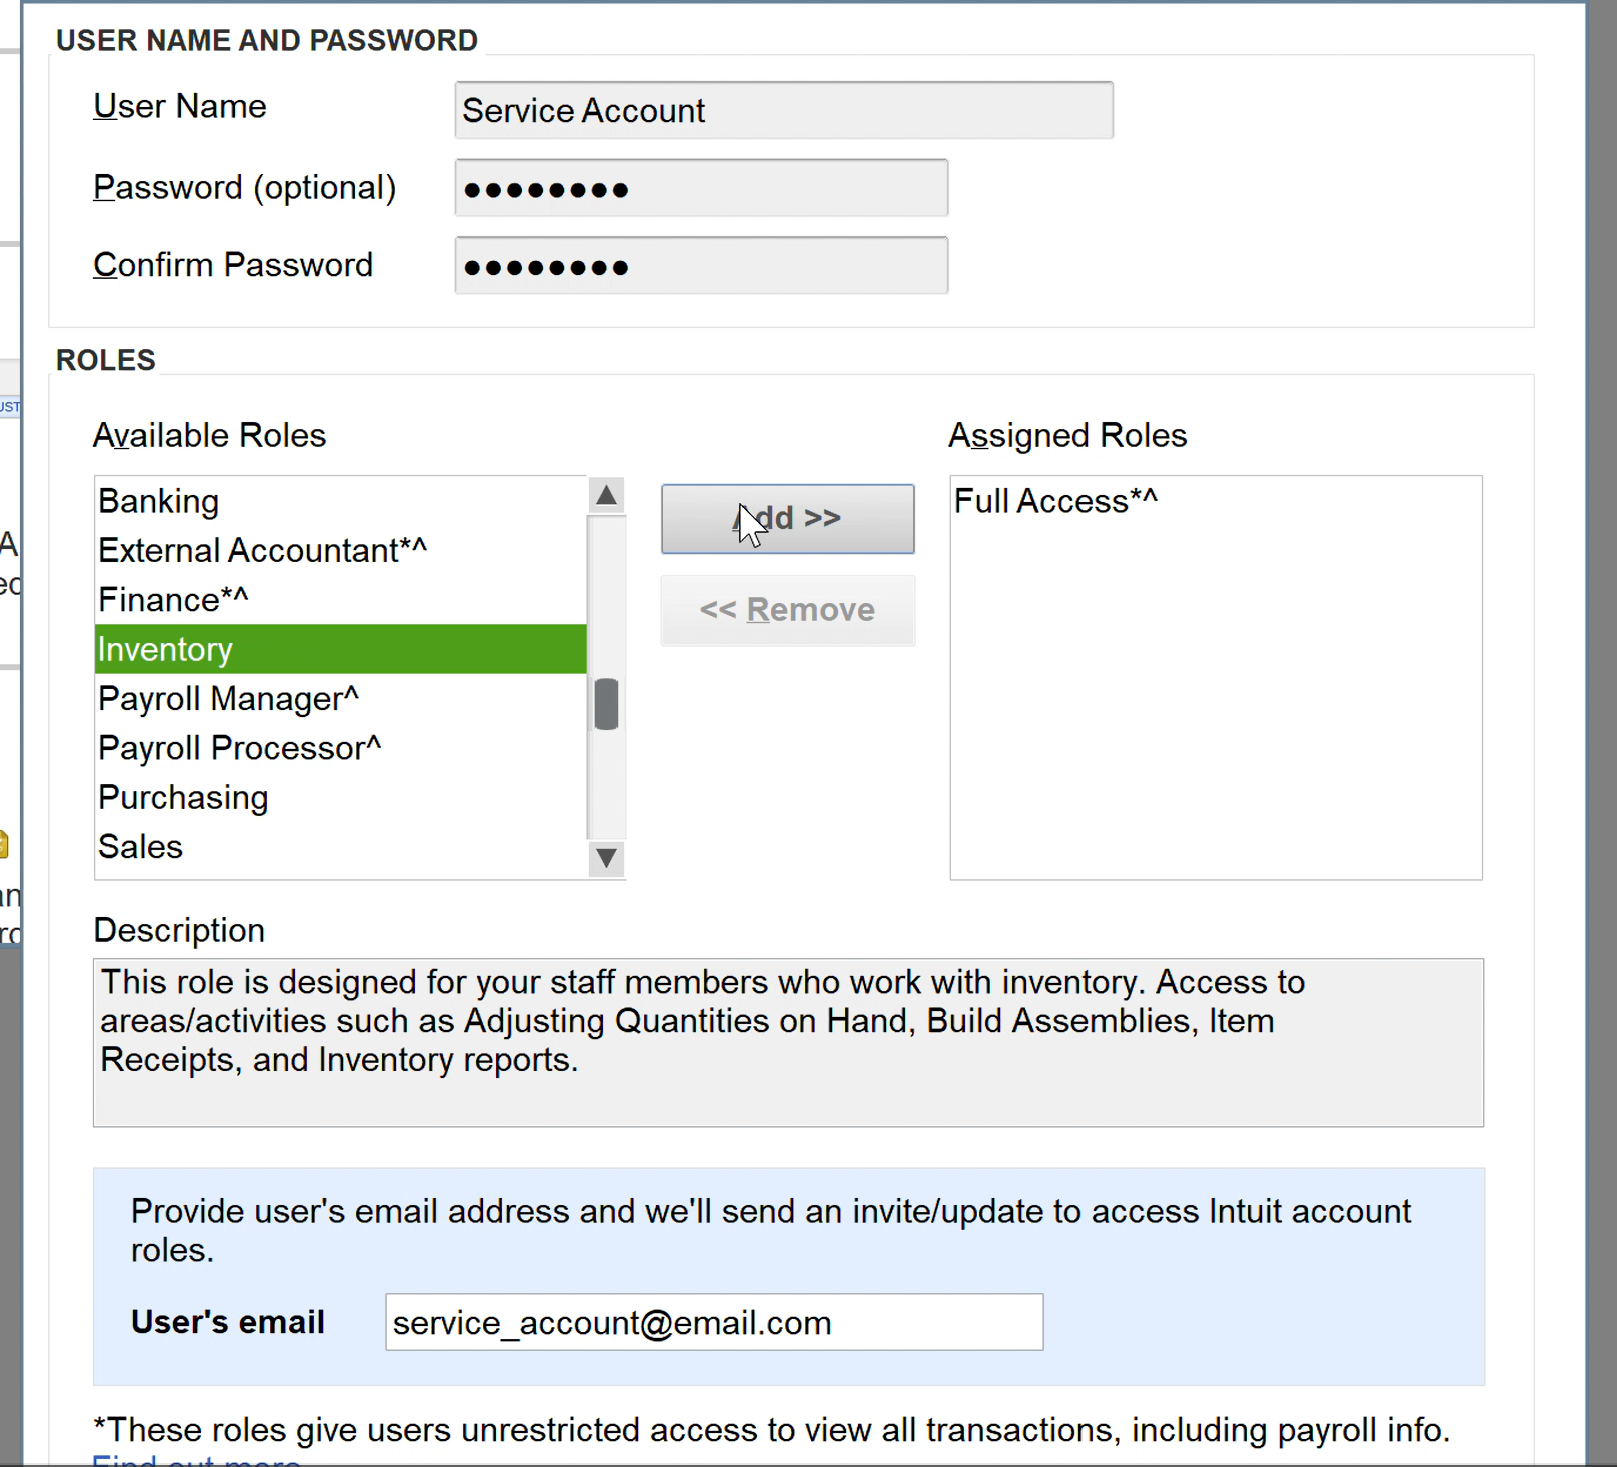
Step 2: Create the dedicated user
Create a user specifically for this connection.
Recommended details:
- Username: something recognizable like
WebConnector,Application Name, orQWC User - Password: use a strong password that your team can store securely
- Email: if QuickBooks requests one, use an email tied to your accounting or operations team
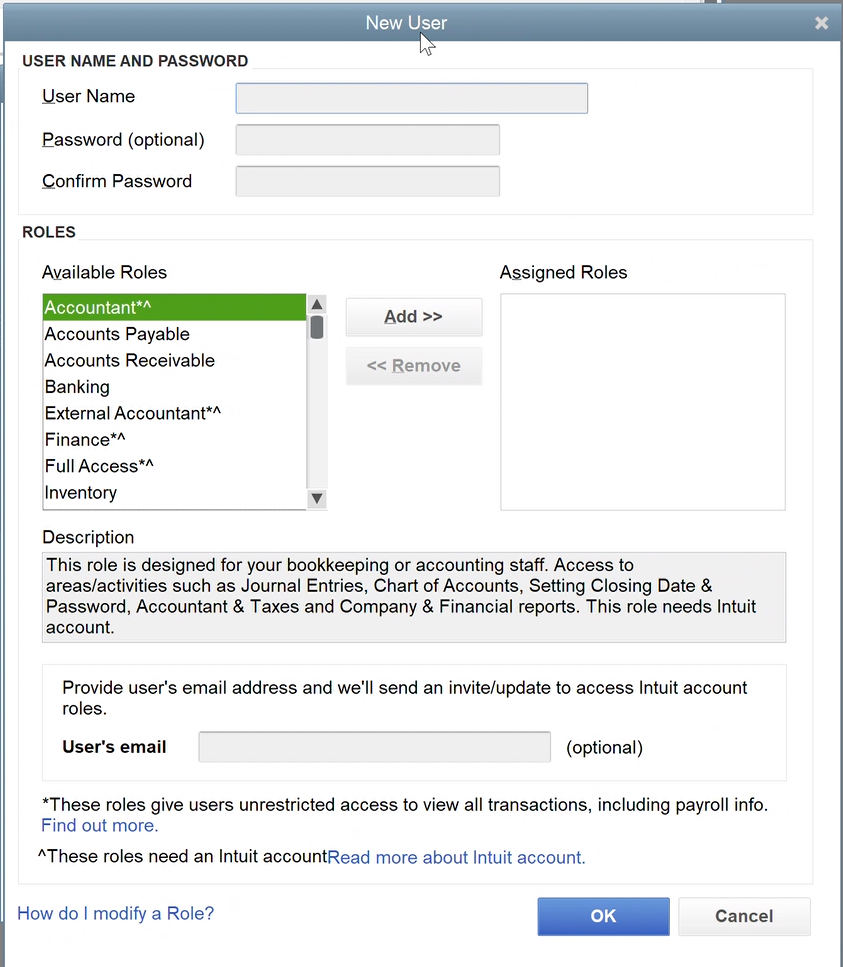
Step 3: Assign permissions or roles
Grant this user the permissions required for your integration.
General recommendation:
- Start with the access level needed for the QuickBooks actions your integration needs to perform.
- If you are unsure, begin with broad access during testing, then reduce permissions carefully once your workflows are validated.
- If your integration depends on actions that QuickBooks restricts to administrators or elevated roles, this user must have those rights or those API calls will fail.
Step 4: Save the new user
- Review the username, password, and assigned permissions.
- Click OK or Save.
- Exit the QuickBooks user setup screen.
Step 5: Configure the integration to use this user
After the dedicated user has been created, confirm that QuickBooks is configured to use it for the connection.
- Open Edit.
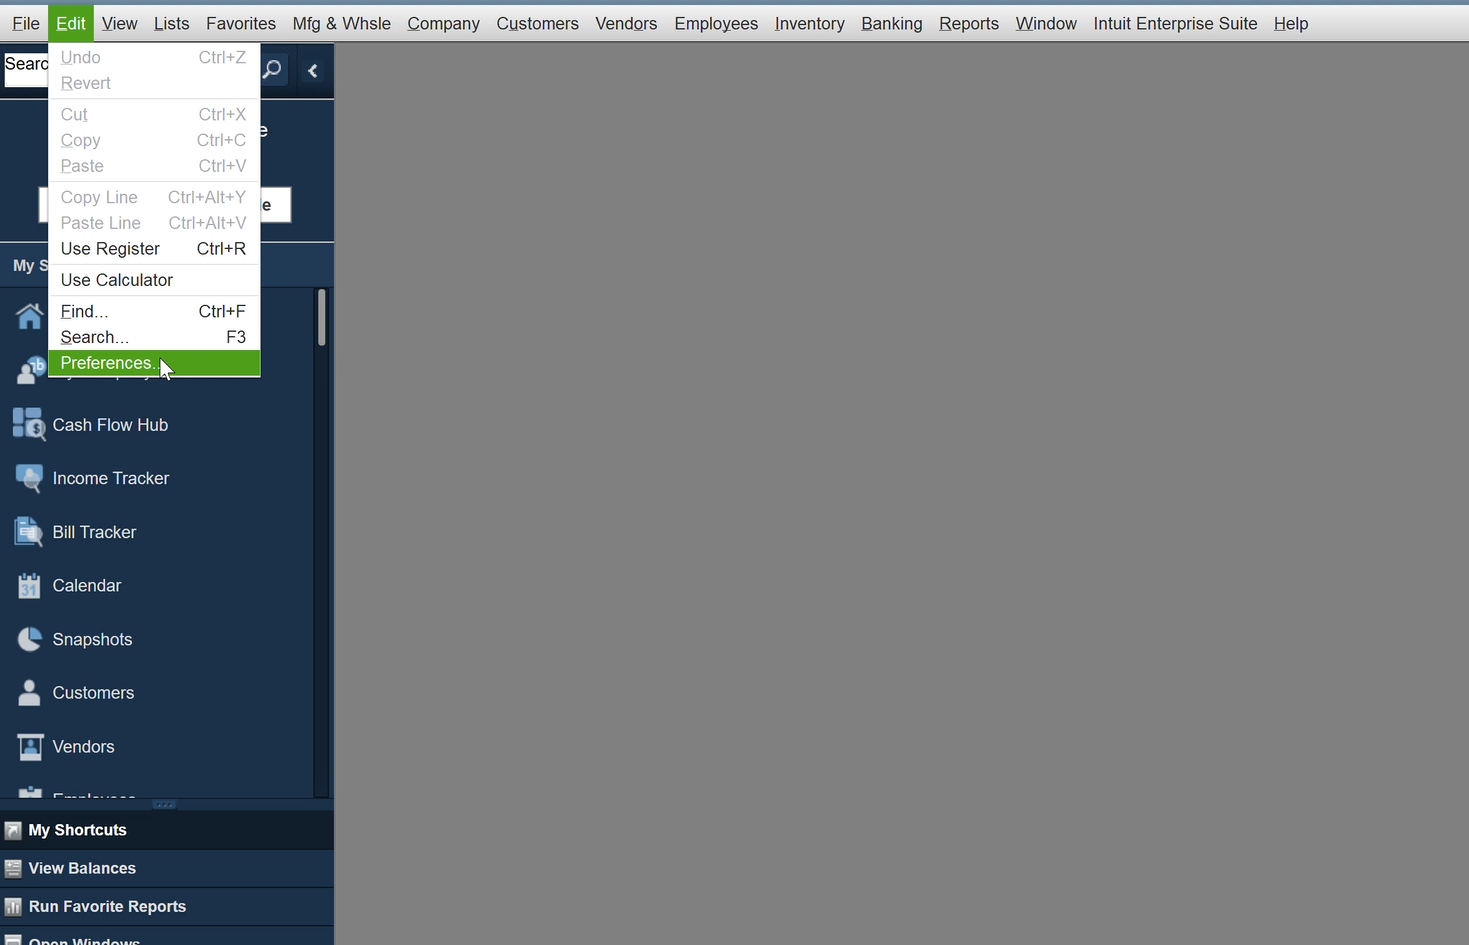
- Select Preferences.
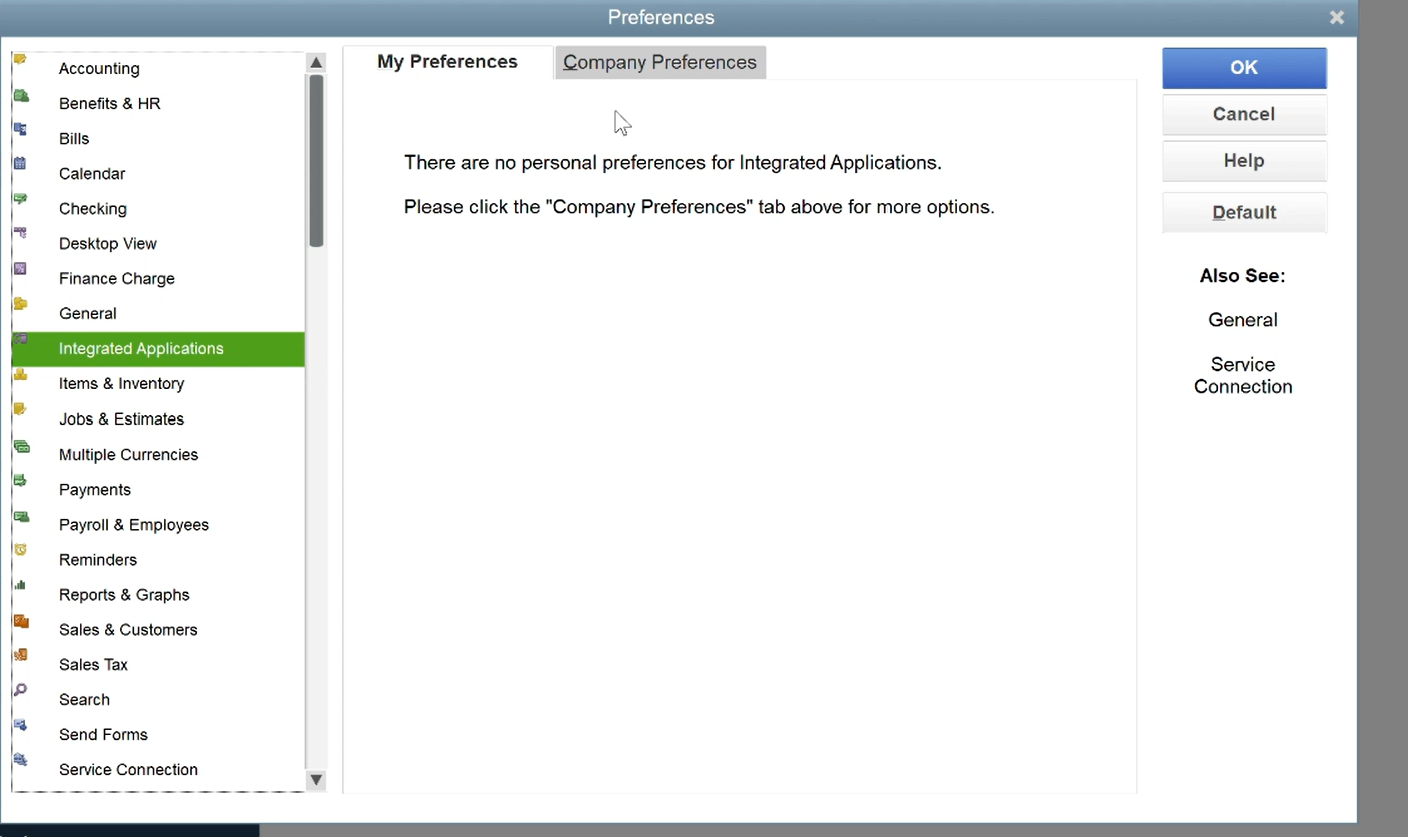
- Open Integrated Applications.
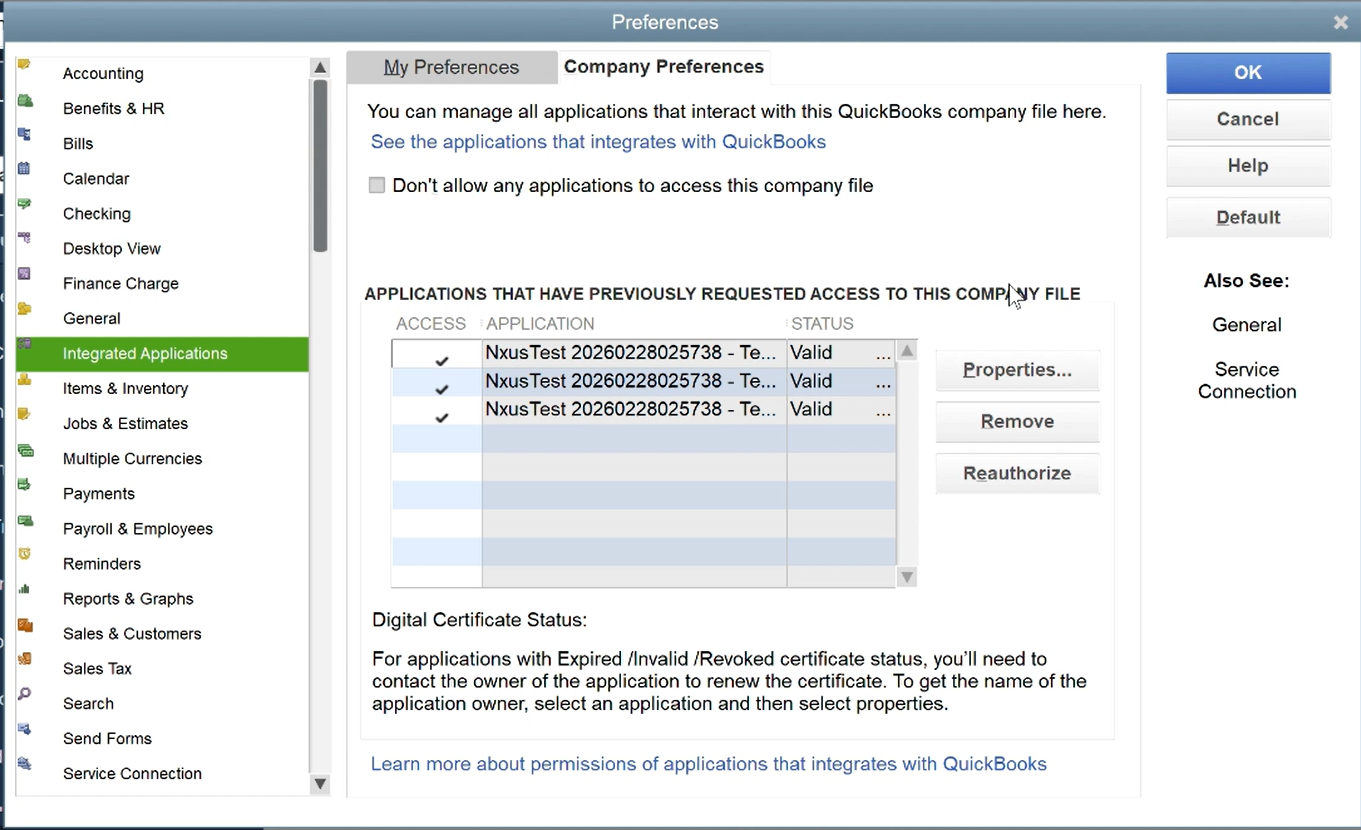
- Select the Company Preferences tab.
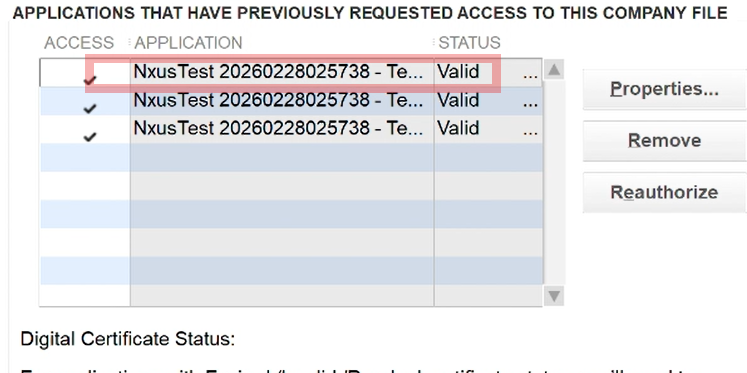
- Select your nXus connection.
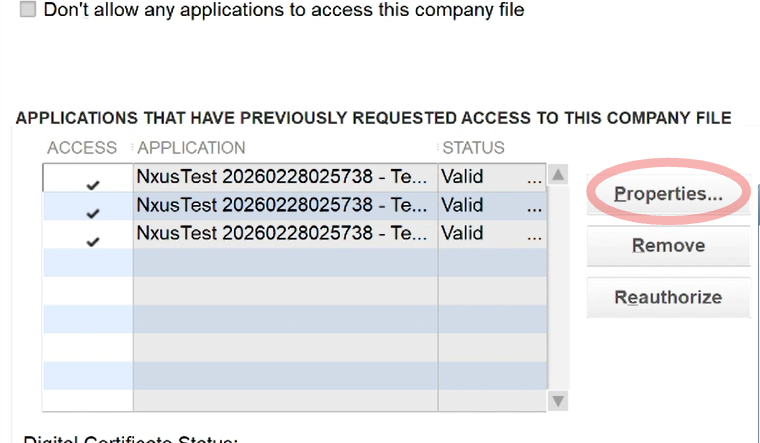
- Click Properties.
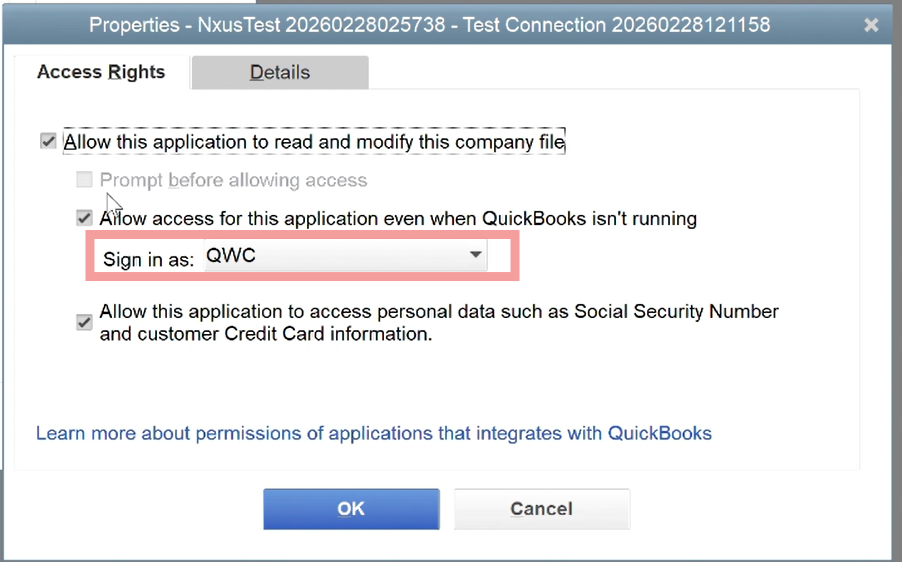
- Choose the dedicated QWC user you created.
Step 6: Keep QuickBooks available for sync
When possible, leave QuickBooks available at the No Company Open screen after setup so the Web Connector can initiate sessions more reliably.
Troubleshooting
Sync actions fail with permission errors
The dedicated QuickBooks user may not have enough access for the operation being attempted. Review the assigned permissions and compare them against the QuickBooks actions your integration needs to perform.
The wrong user is selected in QuickBooks preferences
Return to Edit > Preferences > Integrated Applications > Company Preferences, open the connection properties, and choose the dedicated QWC user again.
An operation works as Admin but fails through the API
That usually means the dedicated integration user does not have the same QuickBooks permissions as the Admin account. Increase the user’s QuickBooks permissions or use a role with the necessary rights.